


A step-by-step guide for rapidly creating a shared vision for execution
So how do you do great design in a rapid, multidisciplinary and inclusive way? How do you set up new projects for success in a fast moving, agile environment? How do you ensure shared understanding and ownership of new initiatives in just a few days?
I now focus a lot of time on facilitating collaborative design workshops, and other methods focused on quickly creating a shared understanding of objectives and buy-in for and execution approach.
In my experience if you set up a new project well a good team can then pick up the ball and run with it. On the other hand, if a project has a wobbly start – with a lack of vision and differing understanding of the objectives – then even the best team can be doomed to failure.
So before I bore you to death talking about it, I will start with a timelapse video of a Collaborative design workshop showing the kind of thing I am going to talk about.
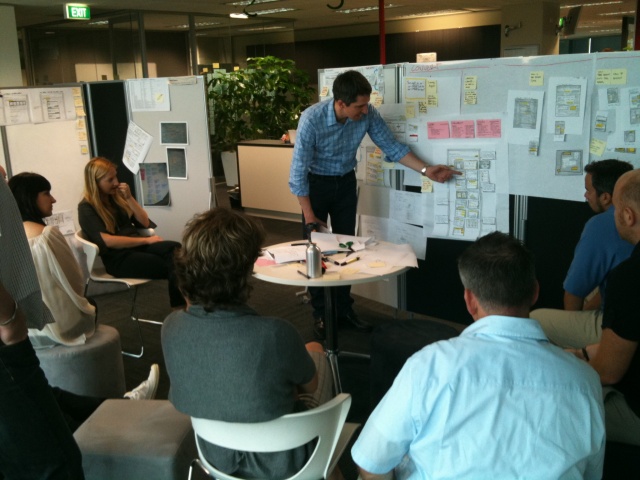
Below is a photo of the core team discussing the final Sketchboard. It's worth noting that there are also priority and sequencing notes – so it's a definition of both what to build, and how to go about it.


What's the output?
Again, before I smother you with the detail of how to do it, I will start with the typical output of 3-4 days of collaborative design workshops. This example was part of a 2-week build Inception. The output was used to drive technical story writing, estimation and planning for agile build phase.
The outputs:
- Business Model Canvas: A definition of who our customers are, what value we will be delivering to them, and how the business will deliver this value – framing the business drivers / objectives and resource required by the project.
- Customer Journey Maps: Exploring the typical journey customers will experience when attempting to extract value from our services. Their motivations, goals and fears and how these define “moments of opportunities” in their journeys. Or more simply, “How might we…” add real value for our customers.
- Design Sketchboards: A way of translating “How might we…” design challenges into design solutions. A sketch based method for rapidly developing and sharing design concepts. In the end, it's the Design Sketchboards that are the real deliverable of these workshops. They represent a great starting point for either writing stories for estimation, or as a clear brief for a UX designer to develop an interactive prototype for customer testing and business validation.

Kicking Off
If you're gathering 10-15 people together for workshops, taking 50% of their time for a number of days then you're asking for a big commitment and YOU BETTER HAVE A PLAN!
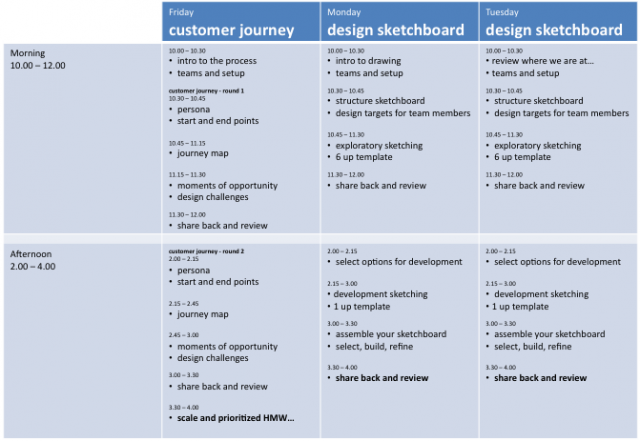
You need to be clear about when they need to be there (I use 2 x 2 hour workshops per day), what process they will go on (sample assets always help) and most importantly a strict and clear schedule of activities and timing for each activity. If you're going to work them hard, then you need a whip. Having a plan is the whip.
Pre-planning the teams is also a good idea in order to ensure a good mix of disciplines. A sample 3-day workshop agenda is shown below.

Understanding the business objectives and drivers
I use the business model canvas, objective statements and other fairly standard inception activities to drive out a shared understanding of the Business Drivers. If you're starting an inception workshop there is a good chance there is someone standing there with a bucket of money and some expectations. It's good to start by understanding what these expectations are. I have posted about the business model canvas before – so won't go into too much detail here.
Below is a time-lapse of me facilitating the session. What I think is clear is that you need a clear, predefined structure, plenty of wall space and (this is the hard bit) the ability to rapidly make sense of the flow of post-it notes that are developed during the session. I have created a set of cheat cards to help facilitate these sessions.
Understand the customer journey
Mapping out the customer journey lets you understand the real world experience for your customers, and describes the context within which your service will exist.
The value in developing customer journeys is two fold:
- The “how might we…” design challenges are an excellent design brief for the next sketch design phase. The process ensures that you have coverage across the entire journey – not just focusing on one small (and usually hard to implement) part of the application.
- You get shared understanding of the context – an understanding of the technology solution in the context of a real life person, doing real life things, with real life motivations, fears and goals
Design the experience together – using a design sketchboard
Design Sketchboards are a place to explore flows, sketch ideas and collaboratively build up a vision for the experience design for key areas within the service. I was first introduced to this way of working via Leah Buley and Brandon Schauer from Adaptive path. Much of what I describe below is based on their method, as are the 1-up and 6-up templates.
As the name suggests, it requires people to sketch. Now you may think this is challenging for some people, but all you need to do is give them the right tools and train them up a bit. If you can sprinkle UXers or other people you know who can draw around the teams, it helps.
Again, I have Adaptive path / UXweek 2010 to thank for reminding me about getting back to basics with drawing. There was a time when I simply thought sketching was a waste of time (I could do it a thousand times quicker in fireworks, and generate interactive prototypes really quickly) BUT what I missed is the shared, team aspect that getting everyone to draw brings with it.
Learning to draw – tool up and warm up
Moving from chicken scratches to what looks like professional sketching is mainly a matter of tools and process. The tools you need are a range of good quality pens and markers – see below. The process is basically :
- Use the 1-up and 6-up templates – it builds confidence
- Start drawing with the thinnest pen (this is where most people stop)
- Give the drawing structure with the thicker Sharpie
- Push areas forward and back using the grey marker
- Highlight key areas with yellow
To warm up, start with drawing boxes and then move to practising drawing some fictional website homepage.
Next steps
Sketchboards are a just a jumping off point for :
- Customer / Business Validation
- Experience Prototyping
- Story writing and estimation
You need to be confident that you have done “Just enough” in order to ensure you have :
- Explored a range of ideas
- Selected and built on the best ones
- A vision for execution that is clear and shared
I hope this helps you in some way. I have run a few of these sessions and, while exhausting, they can be very effective and the tech and business people love them. Once you stop working in isolated “expert” mode (the default for most UXers) and start working collaboratively, it's hard to turn back. It's simply a more effective, faster and more satisfying way to work.
Disclaimer: The statements and opinions expressed in this article are those of the author(s) and do not necessarily reflect the positions of Thoughtworks.